
This lesson could be presented before introducing the Flower Puzzle or afterwards. We choose after and presented first, the Flower Puzzle and Parts of a Flower card work. For non Montessori families, the very minimum precursor (in my opinion) would be a book or some sort of vocabulary background information. With the younger ages, it may work better as an introductory demonstration rather than an independent work. (For more information on the specific botany materials that we use, see here.)
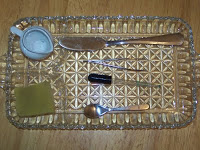
Tray Set Up
Small glass, sponge, eye dropper, tweezers, small spoon,
I would add a small magnifying glass, but ours is missing in action right now. We could survive without it because we had extra large flowers available, but it is absolutely necessary with small flowers.
Lesson Presentation
Remove tray from shelf.
Add a small pair of scissors from the art area (could be on the tray already- in a classroom it would be) and fill the glass half way with water.
Bring the completed tray to work area. We chose to go outside.
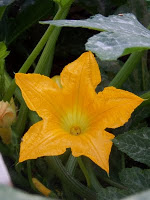
Select a flower. Large flowers like those from squash work well. This is a yellow zucchini blossom.
Ask the child to observe without touching the flower. This is a very important step! Aidan has completed the precursor works and noticed a pistil but not a stamens.
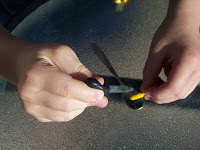
Show the child how to carefully take the flower apart using the tools on the tray.
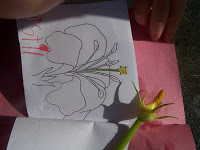 Separate the parts and identify each part individually. If using card work or vocabulary cards of any variety, compare directly to your guide. We used the parts of a flower booklet that Aidan completed last week.
Things To Talk About & Do
At this point, we went back to the garden to find a zucchini blossom with the stamens. Once we found one, we discussed how the pollen from both is needed to create the zucchini. We discussed how the pollen was carried from one type of flower to the other.
We also walked around the garden and looked for flowers that would have the pistil and the stamens together (at our house we found Morning Glories and Petunias).
While we were walking, Aidan noticed that the pistil on the pumpkin blossoms, looked different from the ones on the zucchini. This lead to choosing a pumpkin and a green zucchini to compare to the original yellow zucchini. Each blossom had a unique looking pistil.
When we came back to the table, I taught the boys how to test for pollen by holding the pistil and stamens over a small spoon and dripping water over it. They can then see the tiny particles of pollen floating on top of the water. This was by far their favorite thing to do!
Finishing The Lesson
Allow the child time to freely experiment with the dissection materials and make additional observations.
Stay close to the child and notice once they have ended their productive work with the material, then present the proper way to put the materials away.
Discard the used flower parts in whatever way works best for your family, we returned the parts directly to the garden.
Carry the tray to the sink.
Rinse with water and dry each tool used. Discuss the importance of cleaning the tools so that next time there isn’t any contamination from the previous dissection.
Empty the water glass.
Return the tray to the shelf.
Discuss the appropriate times and uses for this tray in the future. For example, although both boys participated in our lesson today, in the future it is a one-person work. We also discussed what things would be acceptable for dissection. In our case, leaves (which has the same precursor work noted above) and flowers.
Additional Resources
(Click on Picture for Affiliate Links)



This is fantastic… I am sending this post to a friend… and bookmarking it in my homeschooling section!!
Thanks for helping educate my kids Heidi! 🙂
God bless-
Amanda